
How to Tag... "Tagging:101"
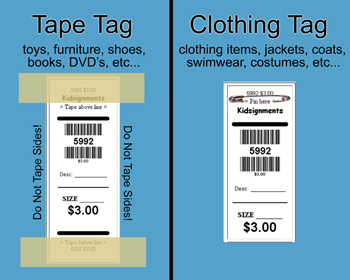
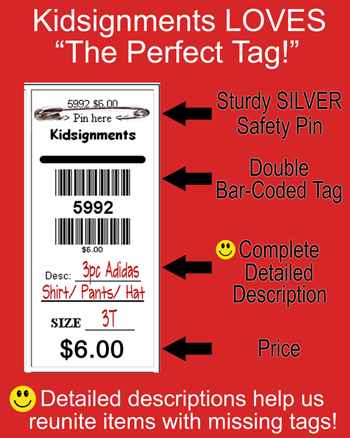
The first step in tagging is to generate your official Kidsignments tags. Tags will contain all the important information we need in order to sell your item. Please make sure to fill tags out in their entirety as each piece of information is very valuable! The tags will contain your seller number, a single or double barcode, a description area, and the item's price. Simply click the 'create tags' tab under the 'Sellers' menu to the left, or to make things really simple just click here. There are two different styles of tags you will need to print, and you will likely end up needing both styles depending on the type of items you have to consign.
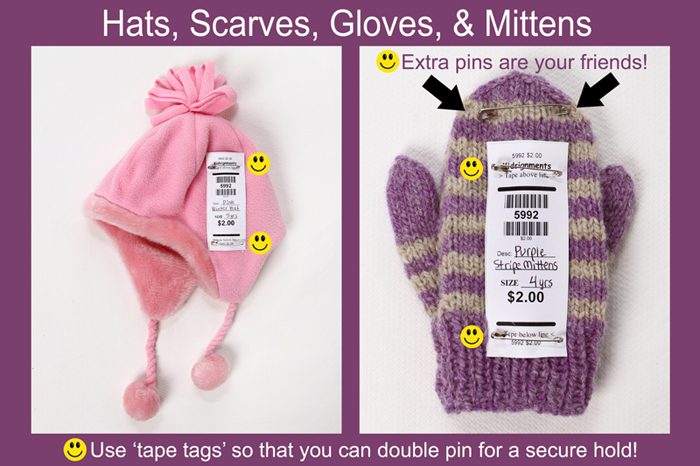
PIN TAGS
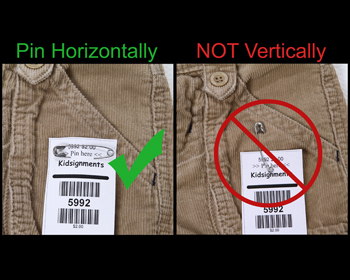
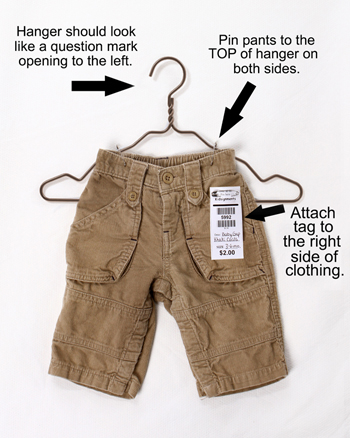
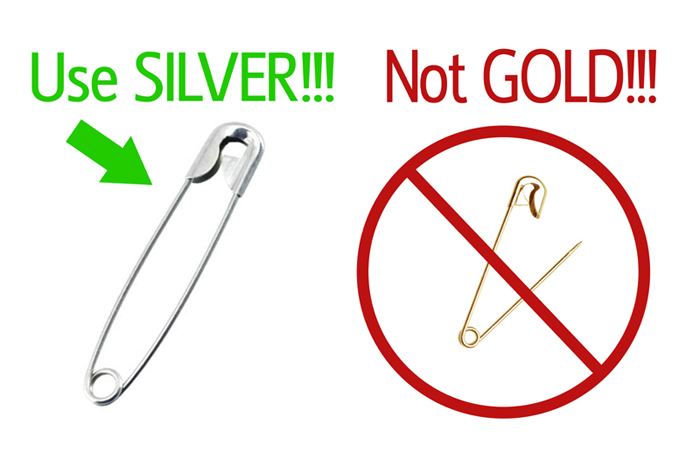
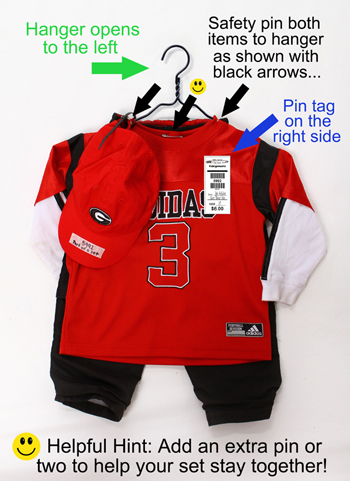
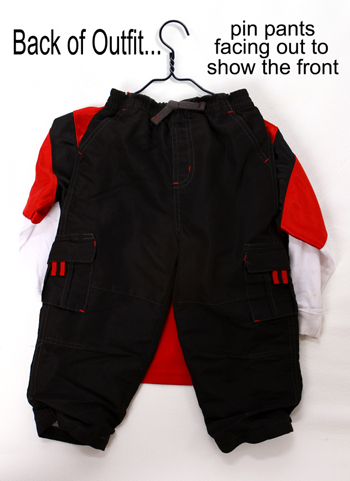
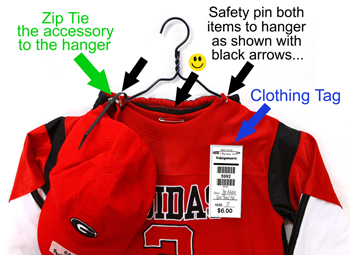
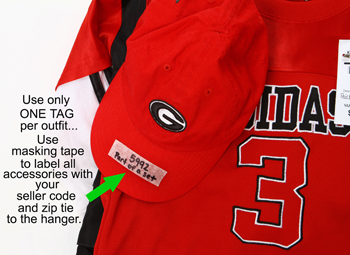
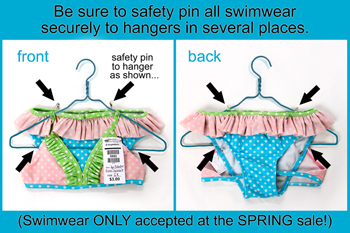
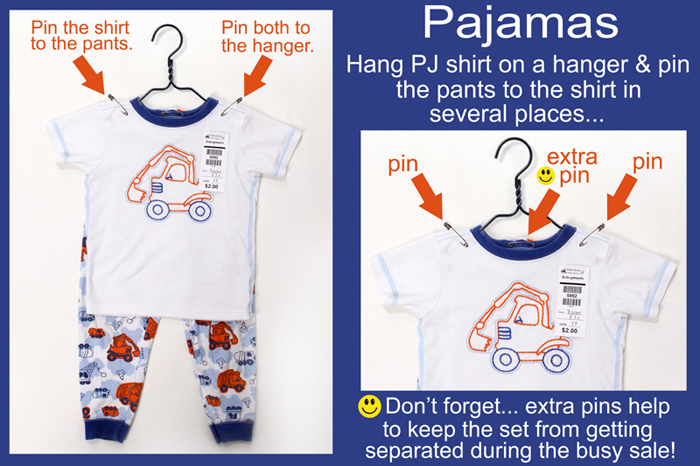
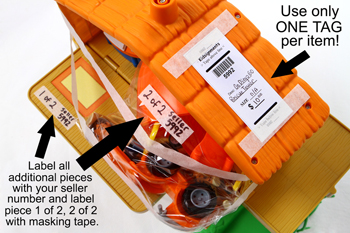
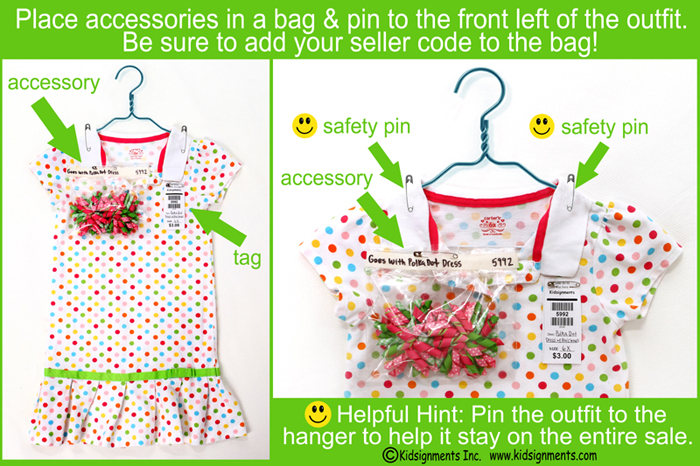
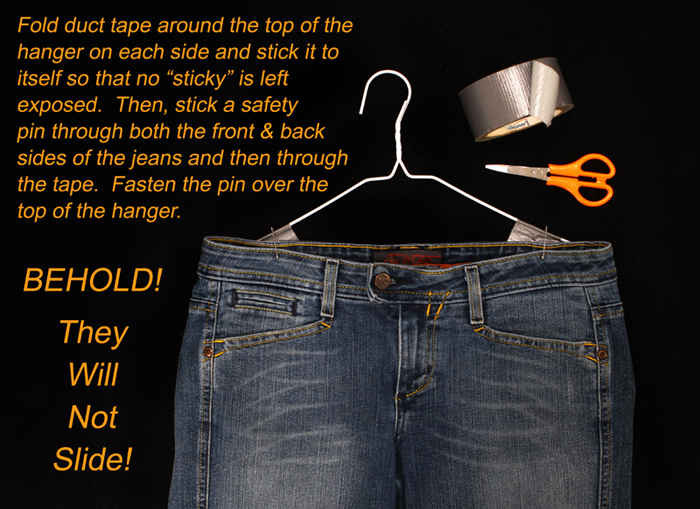
The 'pin tags' are used primarily for clothing. Use a sturdy silver safety pin to secure one tag to each of your clothing items. Use only one tag per item or set... even if the set has multiple pieces. Pin tag to top left of clothing, or your right as you are looking at it. Hang clothes on the hanger so that the hanger looks like a "?" (question mark). Make sure that the tag is pinned above the bold line that appears under the word "Kidsignments." Our volunteers cut the tags off of the items at checkout on this line. To see samples of this, simply look at the pictures below. Here's a helpful hint... most Dollar Tree's have boxes of safety pins containing 200 for $1.00. You can also order them in bulk from companies online... just make sure they are strong and sturdy. Need help determine the right size to write on your tag for clothing? Check our size list to make sure we have a rack for your size.
DO NOT USE TINY GOLD PINS, (they are not sturdy enough), STRAIGHT PINS, (ouch!) or STAPLES!
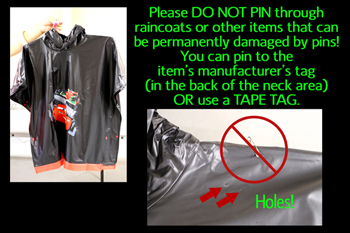
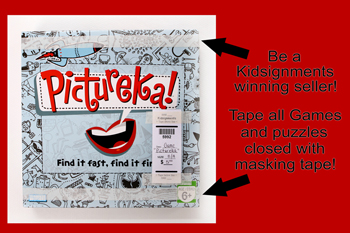
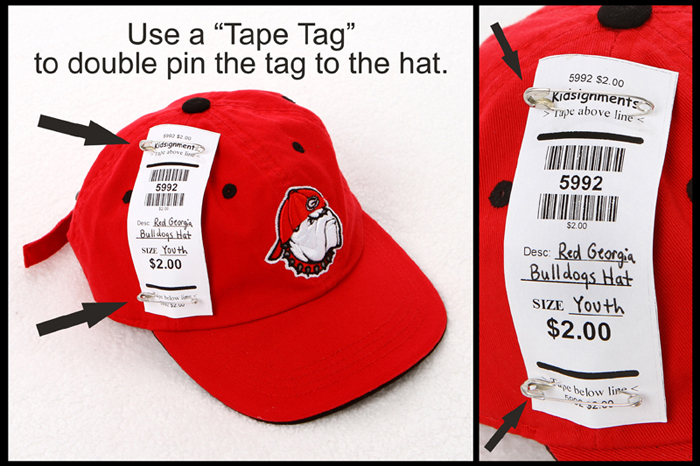
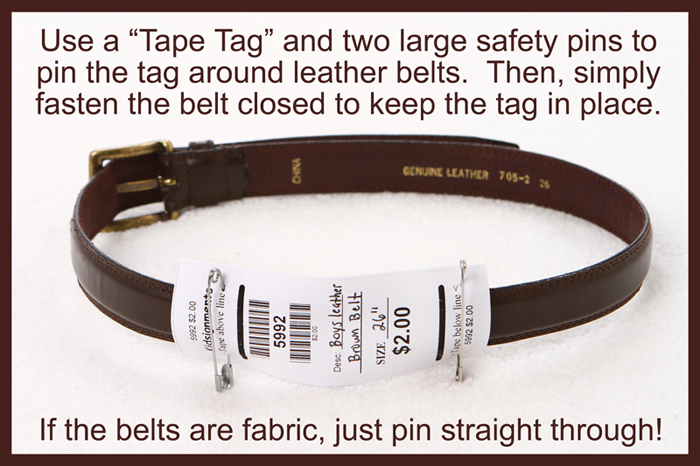
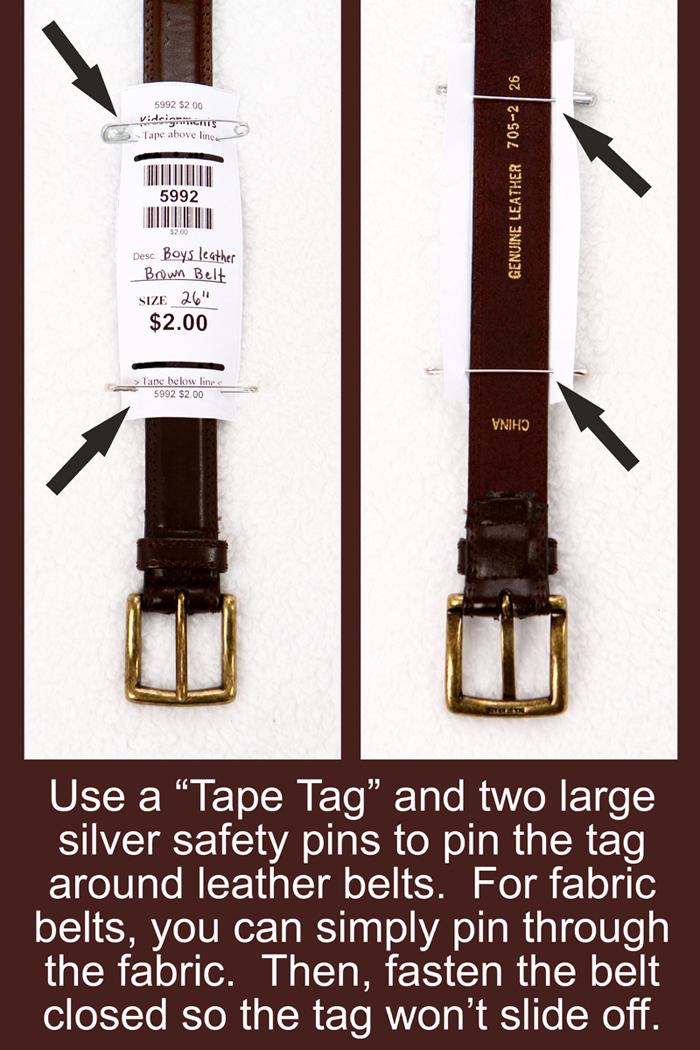
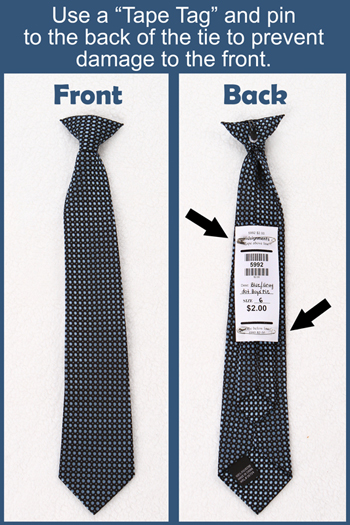
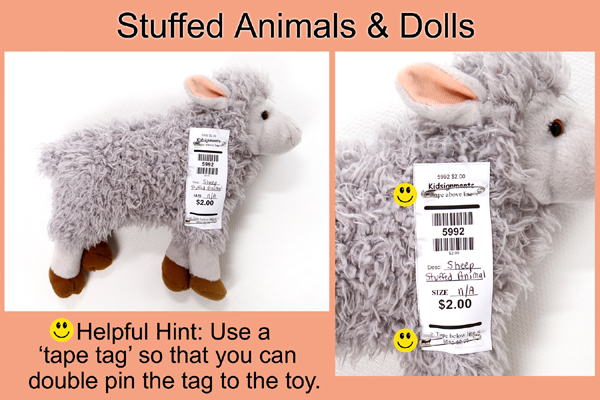
TAPE TAGS
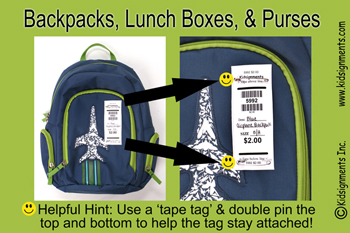
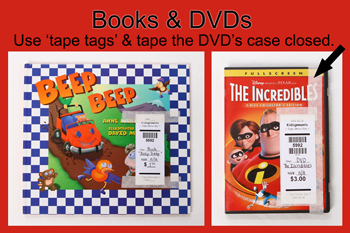
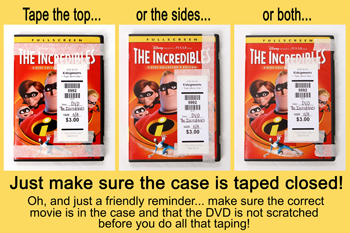
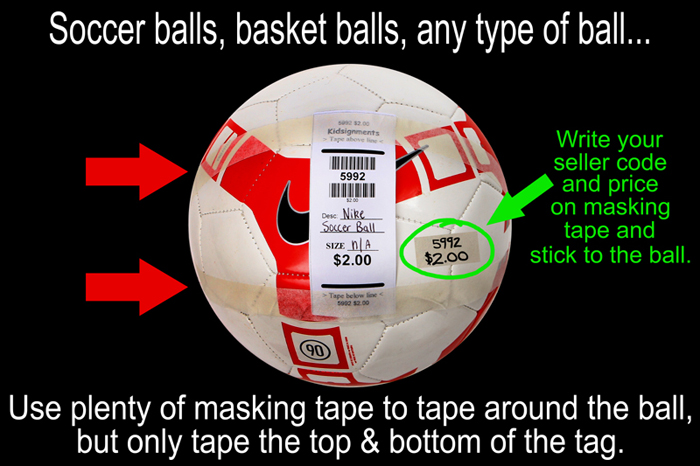
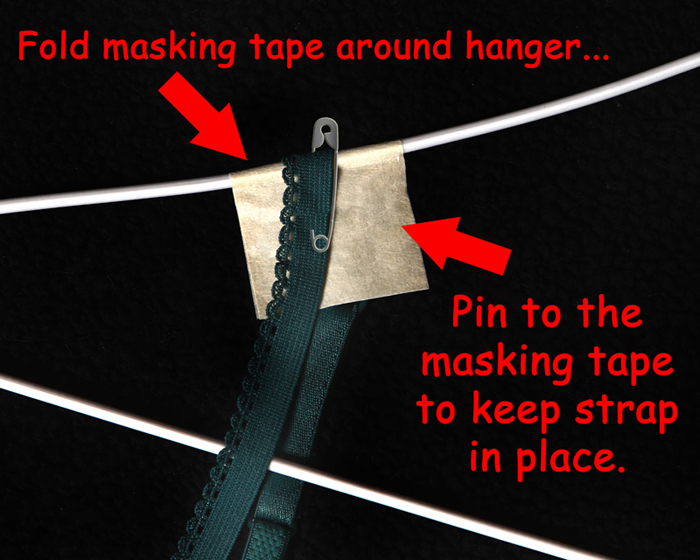
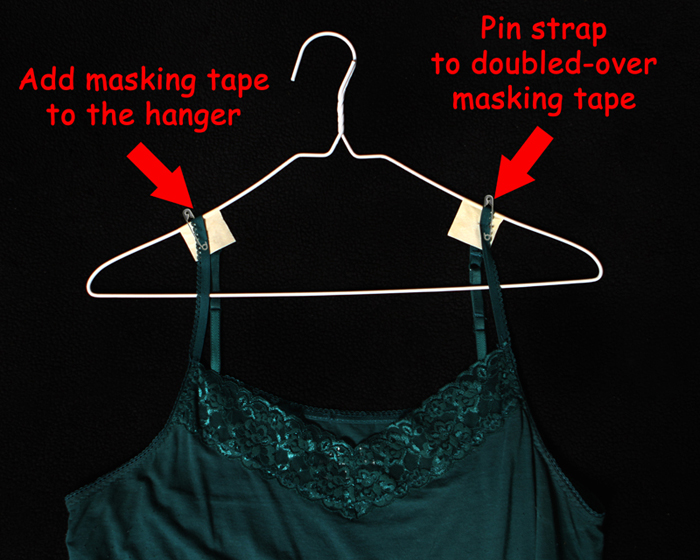
For toys and other hard surface items, use our specially designed 'tape tags' which have been specifically created to be 'taped to' instead of 'pinned on' items. This allows our volunteers to quickly and cleanly remove the tag during checkout by cutting the tags on the cut lines. Secure tag with masking tape to toys and other 'hard surface' items… DO NOT use clear packing tape or scotch tape as this causes the tags to tear during removal at check-out and also impairs the barcode from being read with a barcode scanner. You may however use packing tape to bundle items together, but do not use it to secure tags! Remember to ONLY tape the TOP and BOTTOM of the tag and do not cover the bold 'cut' lines. You can see samples of how to tape tags the correct way in the pictures below.
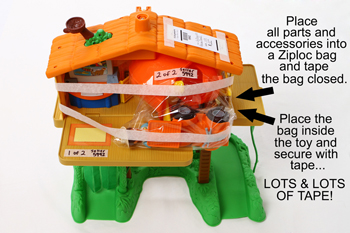
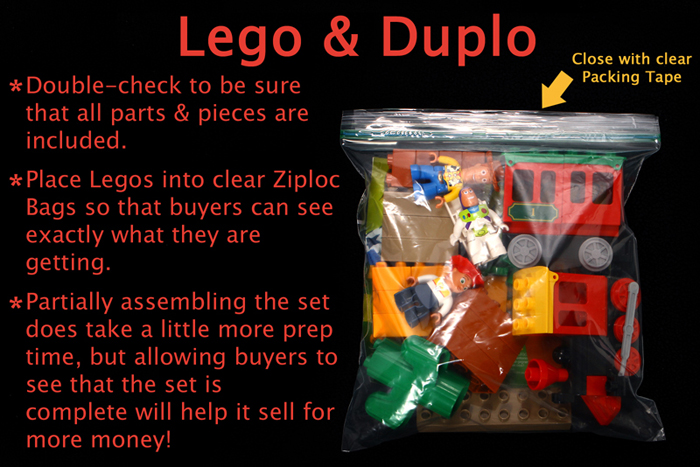
Put small items in a Ziploc-style bag. Attach a 'tape tag' to the outside of the bag with masking tape on both the top and the bottom of the tag but NOT on the sides of the tag. Tape the top of the bag closed with masking tape to be sure the bag remains closed. If the bag contains parts or pieces that go with a larger item, then place the tag on the main item and use masking or packing tape to secure the bag of small parts to the toy itself. Be sure to use masking tape to write your seller number on the Ziploc bag should the two parts become separated. You can see pictures of both scenarios by looking at the pictures of the "Go Diego Go" toys below.
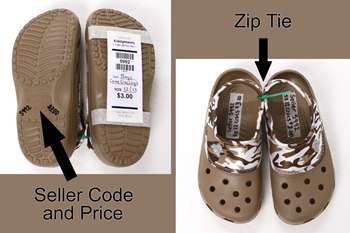
For shoes, use zip-ties (these work great!) or ribbons to tie both shoes together. To make double-sure your shoes do not get separated and end up in the lost and found, write your seller code on bottom of each shoe with a piece of masking tape. Each additional step you take will help make sure your item stays together and on the sales floor!
 |
 |
 |
 |
 |  |
 |
 |
 |
 |
 |
 |
 |
 |
 |
|
 |
|
 |
 |
 |
 |
 |
 |
 |
|
 |
|
 |
|
 |
|
 |
 |
 |
|
 |
 |
 |
|
 |
|
 |
 |
 |
|
 |
|
 |
|
 |
|
*** Please note that all images found on this website, including the Kidsignments logo, are property of Kidsignments, Inc. and it is illegal and unlawful to copy, reproduce, or re-use the images in any way, shape, or form without expressed written consent form Kidsignments Inc. Thank you for your full cooperation. ***